here’s a step-by-step guide on how to install and configure WP Supercache using advanced settings:
Caching is an essential tool for improving the speed and performance of your WordPress website. When a visitor requests a page on your website, WordPress dynamically generates the page, which can be a time-consuming process. Caching allows WordPress to store a static version of the page, so that when a visitor requests the page again, it can be delivered much more quickly. WP Supercache is a popular caching plugin for WordPress that can dramatically improve the speed and performance of your website. It offers a range of advanced caching options, including page caching, object caching, and database caching, as well as options for compressing and minifying your website’s files. WP Supercache is easy to install and use, and can provide a significant boost to your website’s speed and performance.
Step 1
Install and activate the plugin called “WP Supercache”. You can download the plugin here.
If you dont know how to install a WordPress Plugin, check out our article on how to Install a WordPress Plugin.
Step 2
a) Now that the plugin is installed and active, go to the “Settings” tab on the left-hand side of the dashboard and click on “WP Super Cache”.
b) Click on the “Advanced” tab.
c) Under the “Advanced” section, check the following options:
- Enable Caching
- “Expert Mode”
- Disable caching for logged in visitors. (Recommended)
- Cache rebuild. Serve a supercache file to anonymous users while a new file is being generated. (Recommended)
- 304 Browser caching. Improves site performance by checking if the page has changed since the browser last requested it. (Recommended)
- Extra homepage checks. (Very occasionally stops homepage caching) (Recommended)
d) Click Update Status

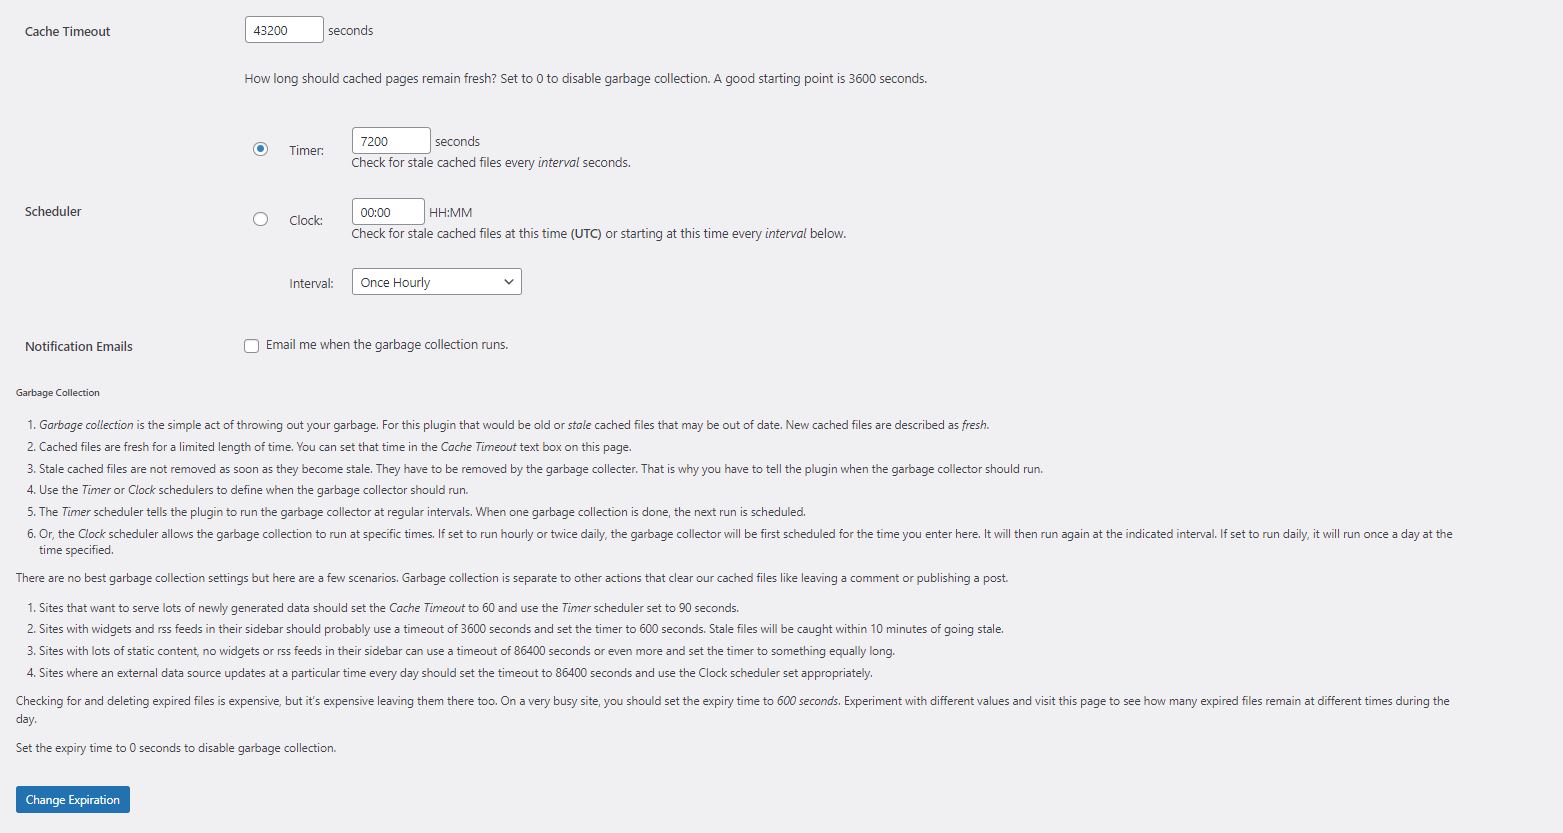
Step 3
a) Under the “Expiry Time & Garbage Collection” section, set the “Cache Timeout” to “43200 seconds”. Set the Scheduler at 7200 seconds.
b) Click “Change Expiration”
Additional Information
- You may need to update Mod_Rewrite rules when you change settings or set this up for the first time. The plugin will prompt you if this is needed, and try to make the changes for you. If it cant make them, you will need to perform them manually.
Congratulations! You have now successfully installed and configured WP Supercache using advanced settings.